Showing posts with label appetizers. Show all posts

Wednesday, April 23, 2014

Gluten-Free Brazilian Pao Cheesy Rolls


Success! I never thought I'd be able to bake real rolls again. You know the kind. They are crispy on the outside, soft and light inside. This recipe is the best I've found. An excellent one from Ellen Brown's Gluten Free Holiday Baking. You know when you start baking and think, "Yeah right, these will never look like the picture in the book". Well, they actually did, fluffed up perfectly. You could hear my hoots and hollering from across the house as they rose into perfect little balls of cheesiness. Yes, I used the word cheesiness. And that cheese flavor is even better toasty with some butter. You'll think you died and went to gluten-free heaven. 

Ingredients:
  • 1/2 cup butter (1 stick) 
  • 1/2 cup milk 
  • 1/2 teaspoon salt
  • 2 minced garlic cloves
  • 2 cups tapioca flour
  • 2 large eggs (room temperature)
  • 2/3 cup grated Parmesan cheese
  • black pepper, to taste
I used my new silicone baking mat instead of parchment paper to line a baking sheet. Preheat your oven at 375 degrees. 
Boil ingredients up to garlic, don't forget to stir and don't burn your milk! Then remove from heat and add in tapioca flour. Bring pot back to stove and reheat, mixing the whole time for about 2 minutes. 
Let cool for a few minutes before plopping the dough into your food processor. Use the steel blade, not the bread making blade, and add eggs. Then once incorporated, add cheese and pepper. Mix again. 
Begin making your pao balls. Wet a soup spoon under cold water and drop about a 2 tablespoon amount of the dough onto your baking sheet. Continue. 
Bake for 18-20 minutes. Enjoy warm with butter. 
Can be frozen. 

Friday, January 17, 2014

Thai Salad Rolls - gluten free and vegan!


I've been making salad rolls for years. I used to get them when I was a teenager after school and think how impressive they looked, how much time they must have taken to make, etc. But boy was I wrong! Don't be fooled, although there are lots of steps, these little packages of loveliness are very simple to make. 
I usually prepare a bunch at a time and put them in the fridge for the week to snack on. They usually don't last more than a day! You may use any of the blow listed ingredients. The only necessary ingredients are the rice noodles. And the best way to assemble these is by using the assembly line method. Prep all your ingredients beforehand and then roll away! A great food to make wit the kids as well. 

Salad Rolls:

  • rice paper wrappers (buy in the Asian foods section of the grocery store)
  • thin rice noodles (bean thread noodles can be used as well, same section; grocery store)
  • carrots
  • green onions
  • cucumber
  • mint leaves
  • fresh cilantro
  • shrimp, tofu, or chicken
  • sesame seeds
Sauce:
  • cup creamy peanut butter
  • 1 can coconut milk
  • 1-2 cloves garlic, chopped
  • 1 teaspoon grated ginger, skin removed
  • 1/4 cup honey or other sweetener (adjust depending on your taste)
  • 2 tablespoons apple cider or rice wine vinegar
  • 1/2 teaspoon salt
  • 1/4 - 1/2 cup water


The Rolls:
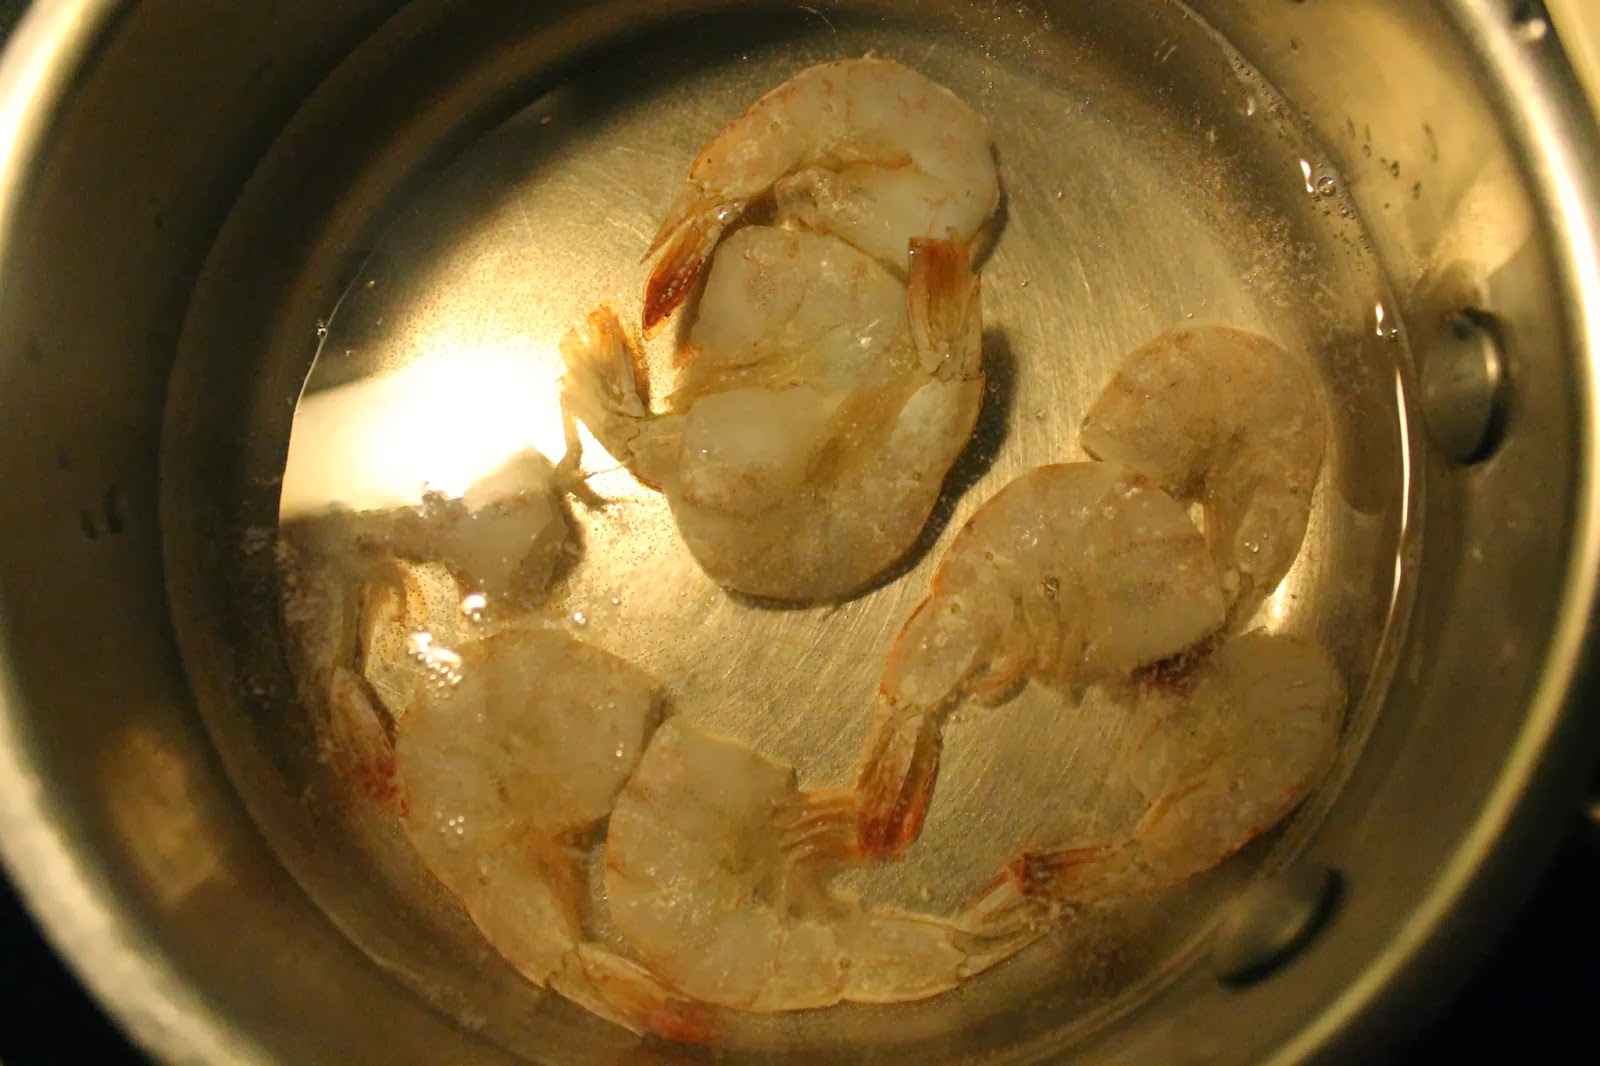
For some reason I always get the shrimp, tofu, or chicken done first. So bring a small to medium pot of water to a boil and drop shrimp in.
Cook for 2-3 minutes. Don't overcook!
While protein is cooking, I place noodles in a medium Pyrex (heat resistant) bowl.
I place noodle bowl in the sink with a strainer on top. Then, drain the broiling shrimp water into the strainer. The boiling water is now used for cooking the noodles in the bowl below.
Leave noodles for 2-3 minutes. Noodles should not be too soggy when you drain the water. If they are, start over. No one likes a soggy  noodle.
Toss very lightly with olive oil so they do not stick together.
Rinse shrimp in cold water to stop cooking process. Peel and cut shrimp lengthwise.
If using tofu or chicken, saute with a bit of say sauce on medium/high heat until fully cooked. Raw tofu is fine too. Cut into strips worthy of being rolled.


Next, prep your veggies for your rolls. 
I like to chop all the veggies into strips. I remove the cucumber seeds to prevent sogginess. 


To assemble, first run the rice paper through running water in your sin, both sides quickly. Place on counter on parchment paper. 
Assembly line time! Start at bottom edge of your rice paper. 
Lay out noodles and then layer as desired. 
Sprinkle with sesame seeds.
Tuck in sides of paper around filling. Now roll tightly! 
Note: wrappers should be very soft, if not, pat warm water on them to soften. 

Sauce:
Prepare the sauce in a small or medium sauce pan. 
Saute grated ginger and chopped garlic for 1 minute. 
Add all the ingredients and simmer on medium heat for 3-5 minutes stirring frequently.
Turn off heat, let cool a bit and either use an immersion blender or a regular blender to obtain a smooth consistency. Place in a small ramekin for serving. Extra sauce will last for a few weeks in fridge. 
Note: I like the sauce cold! 
The rolls can now be eaten. Or wrapped in plastic wrap individually or placed in a zip lock bag. 
Put in fridge and enjoy as ye' will. 


A less than glorious picture of these little bundles of yumminess. I happen to cook mostly late at night, very late! When all the children are sleeping and my mind is racing with good things to cook and more importantly, good things to eat. Down side of course is that pictures don't come out as stunning as they should. My apologies! But once you taste these, I don't think you'll have any complaints.

Friday, September 27, 2013

Homemade Ketchup: a healthier version


I am never going back to buying ketchup. My family loves lots of ketchup and it often gets kind of pricey. Especially since my youngest decided he likes his carrots dipped in it too. After realizing how much sugar was in each tablespoonful of this lovely condiment, I decided it was time to make my own. And I feel much better about feeding this sauce to my family. And the taste is amazing! I swear you'll never go back. I made a double batch and wish I'd made more to freeze. 

Ingredients:
  • 4 medium onions, chopped
  • 5 garlic cloves, chopped
  • 7 lbs whole tomatoes, skinned and chopped
  • 1/2 cup coconut sugar
  • 6 drops liquid stevia
  • 1 cup cider vinegar
  • 1 teaspoon whole cloves
  • 1 teaspoon whole allspice, crushed
  • 2 cinnamon sticks
  • 1 teaspoon celery seed
  • 2 teaspoons dry mustard
  • 1 teaspoon paprika

  • optional: 1 teaspoon smoked paprika and/or 1/4 teaspoon cayenne (for a smokier and spicy version)
  • Directions:
    Saute onions and garlic for about 10 minutes making sure not to burn. 
    Now core your tomatoes and chop into large or medium sized chucks. 
    When onions are translucent, add tomatoes and bring to a boil. 
    Cool and then blend (food processor or blender works).
    Now pour back into pot, add all other ingredients, and bring to a boil again.
    Simmer for half an hour or until desired thickness.
    You can can it at this point or put in fridge and freeze the extra.
    I put mine in glass jars and used the plastic Ball jar tops to freeze them. 
    Keeps in fridge about a month and freezes very well up to a year.
    Yumm!

    Note: If freezing glass Ball jars, I first place them in the fridge for a day, then place them in the freezer and they do just fine. A plastic Zip Lock freezer bag works well too. 

    Thursday, April 25, 2013

    Chocolate Gogi Nutty Yummy Balls


    These are like little sweet energy nuggets. So easy and full of protein and healthy fats. We made about 30 of them and keep them in the fridge for snacks and take along treats. 

    Ingredients:

    • 10 dates, pits removed
    • 1/2 cup gogi berries
    • 1 cup almonds
    • 1 cup walnuts
    • 1/2 cup pumpkin seeds
    • 1/4 cup sunflower seeds
    • 1 cup finely shredded coconut (non-sweetened)
    • 4 tablespoons coconut oil
    • 4 tablespoons raw cocoa powder (if you can't find, any cocoa will do, make sure it's fair trade) 
    • optional: 1/2 cup dried blueberries
    Food process all your ingredients well (took me 3 minutes on high). Leave out 1/2 cup coconut for rolling balls in. 
    Make sure ingredients are well pulverized, no big chunks. 
    Dough should be sticky and soft, but not so much that it's sticking to your hands so much that it's hard to form balls. 
    Form balls, size of your choice. I like making two sized...acorn sized and walnut sized for a variety of appetites. 
    Place coconut on a plate in a thin layer across the plate. Roll balls to cover in coconut and roll one last time in hands. 
    Place on cookie sheet lined with parchment paper, not touching. 
    Place the sheet of balls in the fridge and chill for at least 15 minutes or until hardened. 
    Place balls into a jar and keep in fridge to snack on as needed. 
    These can also be easily frozen for later. 
    Enjoy!

    Monday, March 25, 2013

    Cherry Pumpkin Seed Corn Bread; gluten-free


    Okay, it's not exactly the time for Christmas trees and snowmen, but my boys love anything baked into those shapes any time of year. Especially if it's corn bread. And one of the best things about corn bread (as if you needed another!), is that it's so easy to add yummy and nutritious tidbits to your recipe. 


    An easy one, this recipe took about 45 minutes total, mostly baking time. And I wanted to show everyone my new bigger than life mixing bowl. When i first got it, I thought, 'what am I going to with suck a huge bowl'. But it's now my favorite. Nothing ever spills out and I feel very fancy every time I use it. Which in turn makes everything I bake taste better! 


    Ingredients
    • 1 & 1/2 cup brown rice flour
    • 1 & 1/2 finely ground cornmeal
    • 1/2 cup tapioca flour (or starch)
    • 1 tbs & 1 teaspoon baking powder
    • 1 teaspoon salt
    • 1/4 cup coconut sugar (or any of your choosing)
    • 4 eggs
    • 1/2 cup melted butter (or if vegan: coconut milk; fat and liquid blended together)
    • 1 tbs mixed ground chia and flax seeds (optional)
    • 6 drops liquid stevia (use 1/2 cup sugar if not using stevia)
    • 1 cup milk (or any non-dairy alternative)
    • 1/2 cup dried cherries (halved)
    • 1/2 cup raw pumpkin seeds (chopped)


    Directions
    Preheat oven to 400 degrees F. Coat muffin pan with butter or oil. Set aside.
    In a big bowl combine rice flour, cornmeal, tapioca starch, baking powder, salt, and sugar.
    In a medium-sized bowl, whisk together eggs, milk, butter (cooled), seeds, and stevia. 
    Add the wet ingredients to the flour mixture and mix with an electric mixer until combined.
    Now add in your goodies (meaning cherries and pumpkin seeds or whatever suits your sweet tooth).
    Fill muffin tins almost full. Bake for 15-20 minutes or until you insert a toothpick and it comes out clean.
    If using muffin mold pan for fun shapes, cut baking time to 15 minutes. 
    Enjoy with butter, honey, or jam. 


    Saturday, February 23, 2013

    Gluten-free Chicken Tenders


    Chicken tenders were a big part of my diet growing up in the Bronx. But thy were unfortunately from McDonald's and I'm not sure if they were really chicken after all. But I thought I'd never be able to enjoy my love for the small but mighty chicken tender again, until....

    There's a stand in town called the cultured Caveman and I had the best checken tenders there. They are a very unique cart and fry their tenders in beef tallow. Needless to say, I wasn't about to go out and render some beef tallow and I figured coconut oil is about the healthiest way to fry if you're gonna fry to begin with. Success! The kids and my honey ate them all up. These can be reheated the next day if needed. You can use either coconut or brown rice flour, I think coconut works best. 


    Wednesday, December 5, 2012

    Candied Mixed Nuts


    I've got a big, big sweet tooth. And as hard as I try, there is no avoiding it, I just love sweets. Wold God have made things sweet if we were not supposed to enjoy and live life to it's fullest. And when you pair sweetness with nuts, I can almost convince myself that it's healthy too. 


    Ingredients: 
    • 3 cups nuts ( any kind, I used walnuts, peanuts, almonds, and cashews)
    • 1 egg white
    • 3/4 cup coconut sugar
    • 8 drops liquid stevia
    • 1/2 tsp cinnamon
    Preheat oven at 250 degrees (not 350, like I did the first time I tried to make these). 
    In a medium sized bowl, beat egg white.
    Then, add in stevia first and beat well. Make sure stevia is well incorporated. 
    Next, add sugar and cinnamon. 

    Line a baking sheet with parchment paper and spread nuts out evenly. 
    Bake for 30-50 minutes or until they reach desired consistency. 


    Saturday, September 1, 2012

    Pickle Time


    Pickling made easy. This year we went for the organic pickles. Pickling takes time and good oven mitts, but it's sure worth the effort. Pickled cukes are amazing and you can make tons of variations on our canning recipe below. There are lots of pickle recipes out there but here's our favorite:


    How to pickle: 
    1. Buy your pickles straight from the farm if you can, if not try the farmers market, if not try to get the freshest store bought pickles possible. 
    2. Soak in an ice water bath for 3 hours to overnight. (Makes crisper pickles)
    3. Run jars through dishwasher or boil-sanitize. 
    4. Prepare your rack and canning tongs or Ball Canning Basket (my new favorite canning tool! So much easier.)
    5. Boil lids and screw tops in basket for a few minutes. I used Tatter canning lids this time and love them. The are BPA free and reusable unlike metal lids. A bit more tricky to use, but easy if you follow instructions well. 
    6. Put large canning pot with enough space with 2 jars submerged and bring to a boil.
    7. Begin brine on a large pot. For 12 quarts of pickles, appoximately 12 lbs of pickles, we used the recipe below:
      • 18 cups filtered water
      • 6 cups apple cider vinegar
      • 1/2 cup salt
      • a handful of peppercorns and mustard seed
      • a whole bunch of dill (about 2-3 seed heads per jar)
      • 12 bay leaves
    8. Bring brine to a boil and turn off after a few minutes.
    9. Use 2-3 grape leaves in the bottom of each jar or a 1/4 tsp of Pickle Crisp Granules
    10. Add 2-4 pealed garlic cloves to each jar.
    11. Add any other herbs (I added lavender to the jar below and who knew it was going to taste so good!) 
    12. Take pickles out of bath and rinse again to clean as you pack them into the jars as tight as possible. 
    13. Then ladle brine into jars leaving 1/2 inch of room at top. 
    14. Wipe rims clean and place lids on. Do not secure tightly, leave them a bit loose to let air escape when in pot.
    15. If using basket, put 2 jars in at a time. Kind of a pain in the ass, but it's all that will fit. Otherwise place a few jars on your rack and let it do it's business for about 15 minutes. Water has to cover tops by a few inches! Otherwise air won't be able to escape and vacume won't be created. 
    16. Take jars out and if you have to move them, be very careful and just let them sit there until they are cooled. If you mess with them too much, the seal could get disturbed. 
    17. After processing all the jars, just let them sit and cool. When they are done, take screw caps off and test seal by pushing down on the top to see if it gives at all (for metal lids) or tapping a bit on the side of the lid to see if it moves (if using Tatter lids). 
    18. If you have a tight seal, it is time to screw the caps down (or not, if you choose) and put up on a shelf where you can admire them! 
    19. Your pickles will be ready to eat in a week, but are best after 3 weeks and good up until a year. 


    Below were last years, very colorful! The above recipe is just for your classic dill pickle, nothing so fancy. 


    Saturday, August 25, 2012

    Caprese Salad


    So easy. It's tomato time and so get out your mozzarella. As simple as this recipe is, I often forget about this dish. And if you're Italian like me, you have no excuse. Now go pick some tomatoes and make your grandma proud! 

    Ingredients:
    • 1 ripe tomato
    • 1 lb mozzarella (big or small balls, if big then thinly slice them)
    • a handful of fresh basil leaves
    • 3 tablespoons olive oil
    • 2 tablespoons balsamic vinegar
    • salt and pepper to taste
    Slice tomatoes. Layer with basil leaves. Place mozzarella on side, or layer with tomatoes if using large size. Drizzle on oil and vinegar. Add salt and pepper. Eat-