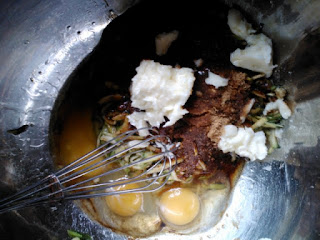
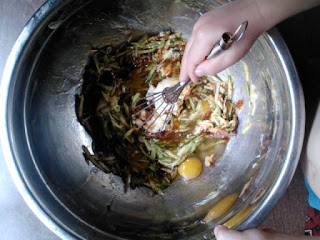
Tuesday, November 5, 2013

Gluten-Free Pumpkin Pie


Every year I do a new pumpkin pie recipe. This year, I was aiming high. A gluten-free crust has always  been a challenge, yet so intriguing. So here's a pie with a tasty nut based and ever-so-slight crust. The crust almost melts into the pie and gives it a richer taste. This pie's packed with fiber and healthy fats. Top with vegan coconut whipped cream and you can have it for breakfast, lunch, and dinner. 

Ingredients: 

Crust
  • 1 cup almond meal (I processed half raw almonds and half walnuts together)
  • 1/4 cup coconut sugar
  • 2 tablespoons chilled butter (coconut oil is vegan) 
  • 1 1/2 tablespoons milk of choice 
Blend all ingredients together in a food processor until they form a nice ball. 
Chill in the fridge for 15 minutes so it is easier to roll out. 
Using 2 pieces of parchment paper, or plastic wrap, roll out dough. Use one piece on the bottom, one on top. Peel off bottom layer, and plop into pie plate. Now slowly and ever so gently remove top sheet, peeling it back. Fit crust in to your liking. 


Pie:
  • 1 box pumpkin puree (Tropical Traditions has a new tetra pac box, awesome!)
  • 3 eggs
  • 1/2 cup coconut sugar (or other sweetener)
  • 1 tablespoon pumpkin pie spice
  • 1/2 teaspoon salt
  • 6 drops liquid stevia
  • 1 can coconut milk


Preheat your oven at 425 degrees. 
In a small bowl, mix coconut milk with stevia drops. Mix well. 
Now using an electric mixer or your processor, mix all the ingredients together until smooth and creamy-looking.

Pour pie mix into your lovely nut pie shell and bake for about 55 minutes. Check regularly, these suckers can be finicky. Center should just wiggle a bit when done. Let rest for at least 30 minutes. Enjoy warm or cold, but remember to add your whipped cream. 

Saturday, November 2, 2013

Vegan Whipped Cream


As I went around my sons classroom to serve up his birthday dessert to all his buddies, I noticed a sad look on one of the boys faces as he said, "I can't have dairy". I then asked him if he'd like some coconut whipped cream and his face lit up. He ate it all and wanted more. 
This stuff's good, real good. And easy too. 

Ingredients:
  • 1 can coconut milk
  • 2 tbs maple syrup or honey
  • 6 drops liquid stevia
Empty most of coconut milk into a small bowl, leaving some of the liquid in the can. The more liquid you choose to use, the more watery the whipped cream will be. And keep in mind that after chilling, the whipped cream will be thicker because the fat will solidify. So don't worry if it looks thin. 

Next, using a hand held mixer, combine the cream and sweeteners for 2-5 minutes or until desired consistency is achieved. Remember, it will be more watery that your end product, but fear not! 

Lastly, pour into a jar or tupperwear with a lid and put in fridge for at least half an hour. But it should keep for weeks, but most likely won't last very long. 


Saturday, October 19, 2013

Gluten-Free Pumpkin Waffles


Yes, this was just a whim. But what a good thing a whim can be! I wasn't quite satisfied this week when I made our weekend waffles. I kept thinking, there must be more. But what? And then, the left over can of pumpkin puree from the pumpkin custard I had made earlier in the week spoke to me. And I obeyed. 
Of course, this shape was totally due to my lack as an experienced waffle maker, but I decided to go with it and my boys loved them. 

Ingredients:
  • 1/2 cup brown rice flour
  • 1/2 cup arrowroot (you can also sub potato starch or cornstarch)
  • 3/4 cup tapioca flour
    • 2 cups milk (or milk sub)
    • 2 Tbsp apple cider vinegar 
    • 1 tbs ground flax and chia seed combo (sub 1/4 tsp xanthan gum)
    • 1/2 tsp salt
    • 1-1/2 tsp baking powder
    • 2 eggs (separated)
    • 1 Tbsp butter, softened or melted (sub coconut oil or veggie oil for vegan)
    • 3 tbsp. coconut sugar (sub 1 drop liquid stevia)
    • 1/2 tsp cinnamon
    • 1/2 cup pumpkin puree (I used canned) 
Now get to work!
Preheat waffle iron. Now get a bunch of bowls out and begin.
Sift all the flours, baking powder, and salt. Set aside.

In a medium sized bowl, mix milk, vinegar, and add in flax and chia seeds.
Let sit for 5-10 minutes to curdle and activate the jelliness of the seeds. (This is your binder)

In a very small bowl, separate your eggs and reserve the yolks. 
Beat your whites until they form stiff peaks. (Don't over beat, or they'll fall)
And in the biggest bowl, mix butter, sugar, and cinnamon.
Now add in the egg yolks, mix.
Add in the flour, mix.
Add pumpkin puree, mix.
Add in the fluffed yolks and fold in carefully to not deflate too much. 

Batter will be pretty watery, so test first on waffle press. Add flours if needed.
Cook on waffle iron until a medium golden color. It will take longer than you expect.

Now fill up your waffle iron about half as much as you usually would and cook. 
Eat immediately with maple syrup and savor the goodness!


Friday, September 27, 2013

Homemade Ketchup: a healthier version


I am never going back to buying ketchup. My family loves lots of ketchup and it often gets kind of pricey. Especially since my youngest decided he likes his carrots dipped in it too. After realizing how much sugar was in each tablespoonful of this lovely condiment, I decided it was time to make my own. And I feel much better about feeding this sauce to my family. And the taste is amazing! I swear you'll never go back. I made a double batch and wish I'd made more to freeze. 

Ingredients:
  • 4 medium onions, chopped
  • 5 garlic cloves, chopped
  • 7 lbs whole tomatoes, skinned and chopped
  • 1/2 cup coconut sugar
  • 6 drops liquid stevia
  • 1 cup cider vinegar
  • 1 teaspoon whole cloves
  • 1 teaspoon whole allspice, crushed
  • 2 cinnamon sticks
  • 1 teaspoon celery seed
  • 2 teaspoons dry mustard
  • 1 teaspoon paprika

  • optional: 1 teaspoon smoked paprika and/or 1/4 teaspoon cayenne (for a smokier and spicy version)
  • Directions:
    Saute onions and garlic for about 10 minutes making sure not to burn. 
    Now core your tomatoes and chop into large or medium sized chucks. 
    When onions are translucent, add tomatoes and bring to a boil. 
    Cool and then blend (food processor or blender works).
    Now pour back into pot, add all other ingredients, and bring to a boil again.
    Simmer for half an hour or until desired thickness.
    You can can it at this point or put in fridge and freeze the extra.
    I put mine in glass jars and used the plastic Ball jar tops to freeze them. 
    Keeps in fridge about a month and freezes very well up to a year.
    Yumm!

    Note: If freezing glass Ball jars, I first place them in the fridge for a day, then place them in the freezer and they do just fine. A plastic Zip Lock freezer bag works well too. 

    Tuesday, July 23, 2013

    Gluten-Free Strawberry Muffins


    I've been working a day here and there at the local farmers market for fun. Last week there were tons of strawberries left over at the end of the day. And I realized that I had never made strawberry muffins....why should all the blueberries get all the love? 

    These were by far my best gluten-free muffin attempt. And oh, they rose like no gluten-free muffin I've ever tried to make. The recipe was adapted from on the Gluten-Free Goddess 's muffin recipes and I can barely take credit. 

    Ingredients:
    • 1 cup almond flour  
    • 3 tablespoons mixed flax and chia seed mix (you can also just use ground flax seeds)   
    • 1/4 cup ground flaxseed   
    • 1/2 cup sorghum flour 
    • 1/2 cup potato starch  
    • 1 cup coconut sugar 
    • 2 teaspoons baking powder 
    • 1/2 teaspoon baking soda 
    • 1/2 teaspoon salt 
    • 1 teaspoon cinnamon 
    • 1/2 cup apple sauce (I was out and used Plum Organics Strawberry Mash!) 
    • 3 eggs 
    • 1/2 cup milk (rice, oat, soy, or almond all work well) 
    • 1 tablespoon vanilla extract 
    • 2 cups strawberries, cut into chunks


    Preheat the oven at 350 degrees and line a muffin tin with liners. You can do without the liners, but it works better with them.
    For almond meal I just processed almonds, added in the chia/flax seed mixture, and the rest of the flax seeds until all were well blended using a food processor.
    Next I mixed all the dry ingredients in a very large bowl and added in the almond and seed mixture.
    Mix well.
    In a medium sized bowl, I combined all the wet ingredients with my favorite electric mixer.
    Lastly, I added in the precious strawberries by folding them in gently.
    I considered chocolate chips here but held back. You might be braver!
    Bake in oven for 30 minutes or until toothpick comes out clean.
    Enjoy!


    Tuesday, July 9, 2013

    Make your Own Gluten-Free Flour MIxes, top 3 best!


    It's time to give you all the low down on how to make your very own gluten-free flour mix. When I run out for some odd reason (usually laziness), I turn to Bob's Red Mill Gluten-free Flour Mix which does an excellent job as well.
    But usually, I make a big batch of sweet rice flour blend that lasts me a month or two depending on how late I stay up to bake. This recipe is adapted from one of Carol Kininski's books (amazing flour chemist and baker!)
    Of course I always leave out the xanthan gum (she recommends 4 tsp per batch) and substitute it with my flax/chia seed combo with great results.

    I take a large gallon glass jar, put all the flours in, put the lid o tight, and shake, shake, shake! Store until needed.


    • 4 1/2 cups white rice flour
    • 2 cups potato starch (not flour!)
    • 1 1/2 cups sweet rice flour
    • 1 cup tapioca starch
    Note: Add in flax/chia seed combo per recipe, not here.

    The last of the great gluten-free flour mixes that I've found is by the wise Bette Hagman. She is one of the pioneers of gluten-free cooking. This mix is called the featherlight mix and bakes well. Again, I use a big jar, put all the flours in and just give it a good shake for a few minutes.


    • 3 cups rice flour
    • 3 cups tapioca flour
    • 3 cups cornstarch (you may sub potato starch as well)
    • 3 tablespoons potato flour (not starch! Sometimes i just leave this out and it's just fine)

    Wednesday, June 12, 2013

    Zucchini Chip Bread


    Oh my! All these zucchini's popping up and not all that much interesting to do with them. And this is a great way to get your kids to eat veggies. Disguised! But what's a quick bread without chocolate chips?

    Ingredients:
    • 2 cups grated zucchini
    • 1 cup coconut sugar (or other type of sweetener)
    • 8 drops liquid stevia (or increase sugar by 1 cup)
    • 1/2 cup olive oil
    • 1/2 cup butter (1 stick)
    • 3 eggs
    • 3 cups gluten-free blend flour (you can use the blend from here)
    • 1 tsp salt
    • 1 1/2 tsp baking powder
    • 1 1/2 tsp baking soda
    • 1 tbs cinnamon
    • 1 cup chopped walnuts
    • 1 cup chocolate chips
    • 1/4 tsp almond extract
    • optional: chopped pumpkin seeds or sunflower seeds


    Preheat oven to 350 degrees. Grease 2 loaf pans or 4 small mini loaves. You can also do muffins if you chose. 
    Mix ingredients up to eggs and blend well. I used an electric mixer. 


    Now sift all the dry ingredients together. 
    Combine into wet ingredients and mix well. 
    Fill pans 3/4 of the way full. 
    Bake for 40 minutes or until toothpick comes out dry. 
    Eat and be merry!


    Tuesday, May 7, 2013

    Coconut Whipped Cream and Strawberries


    • 1 can coconut milk ( I used Native Forrest)
    • 1-3 tablespoons maple syrup (depending on your sweet tooth)
    • 6 drops liquid stevia
    • strawberries (the more the better)
    The easiest desert or snack you could ever make. Wash, de-stem, and half strawberries and place in bowl. Empty most of coconut milk into a small bowl, leaving some of the liquid in the can. The more liquid you choose to use, the more watery the whipped cream will be. And keep in mind that after chilling, the whipped cream will be thicker because the fat will solidify. 

    Next, using a hand held mixer, combine the cream and sweeteners for 2-5 minutes or until desired consistency is achieved. Remember, it will be more watery that your end product. 

    Lastly, pour into a jar or tupperwear with a lid and put in fridge for at least an hour. But it should keep for weeks, but most likely won't last if you like whipped cream. 

    Serve with berries or even make into a strawberry shortcake if you feel really adventurous! I used Pamela's cake mix baked into muffins. Cut muffins in half and layer cake, whipped cream, and strawberries. Yumm!!

    Thursday, April 25, 2013

    Chocolate Gogi Nutty Yummy Balls


    These are like little sweet energy nuggets. So easy and full of protein and healthy fats. We made about 30 of them and keep them in the fridge for snacks and take along treats. 

    Ingredients:

    • 10 dates, pits removed
    • 1/2 cup gogi berries
    • 1 cup almonds
    • 1 cup walnuts
    • 1/2 cup pumpkin seeds
    • 1/4 cup sunflower seeds
    • 1 cup finely shredded coconut (non-sweetened)
    • 4 tablespoons coconut oil
    • 4 tablespoons raw cocoa powder (if you can't find, any cocoa will do, make sure it's fair trade) 
    • optional: 1/2 cup dried blueberries
    Food process all your ingredients well (took me 3 minutes on high). Leave out 1/2 cup coconut for rolling balls in. 
    Make sure ingredients are well pulverized, no big chunks. 
    Dough should be sticky and soft, but not so much that it's sticking to your hands so much that it's hard to form balls. 
    Form balls, size of your choice. I like making two sized...acorn sized and walnut sized for a variety of appetites. 
    Place coconut on a plate in a thin layer across the plate. Roll balls to cover in coconut and roll one last time in hands. 
    Place on cookie sheet lined with parchment paper, not touching. 
    Place the sheet of balls in the fridge and chill for at least 15 minutes or until hardened. 
    Place balls into a jar and keep in fridge to snack on as needed. 
    These can also be easily frozen for later. 
    Enjoy!

    Thursday, April 18, 2013

    Gluten-Free Pumpkin Pie


    One of the best pies in my opinion is the pumpkin pie. It's more of a meal, than a desert. A vegetable, yes, a vegetable snuck carefully and oh so elegantly into a sweet treat. Lots of fiber, sweet, but not too sweet, and lovely to look at. When it's late at night and I should really be sleeping and that craving kicks in, I get way too happy when I remember that there is a pumpkin pie in the fridge waiting to hang out on the couch with me. 

    Instructions: 

    Gluten-free crust: (or sub ready made pie crust) 
    • 8 tablespoons (1 stick), cut into 1/2 inch squares
    • 1/2 cup white rice flour
    • 1/4 cup sweet rice flour
    • 1/4 cup tapioca starch
    • 1/4 cup potato starch
    • 2 tsp baking powder
    • 1 tsp salt
    • 2 tablespoons coconut sugar (or other sweetener)
    • 2 tablespoons cold water
    Filling:

    • 2 cups pumpkin puree (1 can)
    • 2 eggs
    • 1 can full fat coconut milk
    • 1 cup coconut sugar (or 1/4 cup maple syrup, 1/4 cup honey, and 4 drops liquid stevia combined)
    • 1/2 tsp cinnamon
    • 1/8-1/4 tsp nutmeg
    • 1/4 tsp ground ginger
    • 1/4 tsp cardamon    
    Begin by cutting the cold butter up into 1/2 inch pieces. Set in freezer for half an hour to get hard but not freeze. 

    Next, mix all the dry crust ingredients using a sifter. If using coconut sugar, mix in with a whisk afterwards. 

    You can now work on the filling while you wait for the butter to chill. 

    Filling is easy, just combine all ingredients and mix with your electric mixer. 
    If using honey/maple/stevia sweetening mix, do as follows. 
    Combine maple syrup and honey in a small sauce pan and heat until it reaches a soft bead stage (meaning that when a drop is put into a glass of water, it beads up into a ball instantly). 
    Make sure you do not cook it past this stage, about 240 degrees. 
    Then, let cool a few minutes. Add stevia and mix well. Then add to pumpkin mix and blend. 

    Now go back to your crust and remove from freezer. 
    Mix in dry ingredients using a pastry cutter. You can also use the back of a fork. 
    Mix until it looks like coarse cornmeal grains. 
    Add cold water 1 tablespoon at a time and mix with cutter. 
    You want to add just enough water to make the dough begin to stick together, but not too much. 
    Shape dough into a ball and flatten a bit into a disk. 
    Wrap in plastic wrap or a zip-lock bag and chill in fridge for 1 hour. 
    I made a triple batch and froze two disks worth of dough in the freezer for another time. 

    Take dough out of fridge and place between 2 pieces of parchment paper. 
    Roll out to desired thickness. 
    Remove top paper and invert onto buttered pie plate. 
    Carefully remove top piece of paper and slowly press into pie plate. If it rips, just piece it together. So forgiving. 
    Leave 1/2 inch over edge of pie pan and shape as desired. 

    Pour filling into crust and bake for 45 minutes to an hour or until firm in the center. Let cool completely and keep in fridge, enjoy!! It's good for you!!

    Monday, March 25, 2013

    Cherry Pumpkin Seed Corn Bread; gluten-free


    Okay, it's not exactly the time for Christmas trees and snowmen, but my boys love anything baked into those shapes any time of year. Especially if it's corn bread. And one of the best things about corn bread (as if you needed another!), is that it's so easy to add yummy and nutritious tidbits to your recipe. 


    An easy one, this recipe took about 45 minutes total, mostly baking time. And I wanted to show everyone my new bigger than life mixing bowl. When i first got it, I thought, 'what am I going to with suck a huge bowl'. But it's now my favorite. Nothing ever spills out and I feel very fancy every time I use it. Which in turn makes everything I bake taste better! 


    Ingredients
    • 1 & 1/2 cup brown rice flour
    • 1 & 1/2 finely ground cornmeal
    • 1/2 cup tapioca flour (or starch)
    • 1 tbs & 1 teaspoon baking powder
    • 1 teaspoon salt
    • 1/4 cup coconut sugar (or any of your choosing)
    • 4 eggs
    • 1/2 cup melted butter (or if vegan: coconut milk; fat and liquid blended together)
    • 1 tbs mixed ground chia and flax seeds (optional)
    • 6 drops liquid stevia (use 1/2 cup sugar if not using stevia)
    • 1 cup milk (or any non-dairy alternative)
    • 1/2 cup dried cherries (halved)
    • 1/2 cup raw pumpkin seeds (chopped)


    Directions
    Preheat oven to 400 degrees F. Coat muffin pan with butter or oil. Set aside.
    In a big bowl combine rice flour, cornmeal, tapioca starch, baking powder, salt, and sugar.
    In a medium-sized bowl, whisk together eggs, milk, butter (cooled), seeds, and stevia. 
    Add the wet ingredients to the flour mixture and mix with an electric mixer until combined.
    Now add in your goodies (meaning cherries and pumpkin seeds or whatever suits your sweet tooth).
    Fill muffin tins almost full. Bake for 15-20 minutes or until you insert a toothpick and it comes out clean.
    If using muffin mold pan for fun shapes, cut baking time to 15 minutes. 
    Enjoy with butter, honey, or jam. 


    Monday, March 4, 2013

    Gluten-Free Waffles with Berry Sauce


    Oh my! After many attempts, the recipe is perfected and totally gluten-free. Crispy on the outside, soft on the inside and oh so good. Make this with or without the berry sauce, but just make it because you won't be disappointed. Use pre-made gluten-free flour mix to make it a bit easier if needed. We love Bob's red mill gluten-free flour. 

    Ingredients:

    Waffles:
    • 1/2 cup brown rice flour
    • 1/2 cup arrowroot (you can also sub potato starch or cornstarch)
    • 3/4 cup tapioca flour
      • 2 cups milk (or milk sub)
      • 2 Tbsp apple cider vinegar 
      • 1 tbs ground flax and chia seed combo (sub 1/4 tsp xanthan gum)
      • 1/2 tsp salt
      • 1-1/2 tsp baking powder
      • 2 eggs (separated)
      • 1 Tbsp butter, softened or melted (sub coconut oil or veggie oil for vegan)
      • 3 tbsp. coconut sugar (sub 1 drop liquid stevia)
      • 1/2 tsp cinnamon

    Berry Syrup:
    • 2 cups berries
    • 1 tbsp lemon juice
    • 3 tbsp coconut sugar


    For waffles:
    Preheat waffle iron. Now get a bunch of bowls out and begin.
    Soft all the flours, baking powder, and salt. Set aside.
    In a medium sized bowl, mix milk, vinegar, and add in flax and chia seeds.
     Let sit for 5-10 minutes to curdle and activate the jelliness of the seeds.
    In a very small bowl, separate your eggs and reserve the yolks. Beat your whites until they form stiff peaks. (Don't over beat, or they'll fall)
    And in the biggest bowl, mix butter, sugar, and cinnamon.
    Now add in the egg yolks, mix.
    Add in the flour, mix.
    Add in the fluffed yolks and fold in carefully to not deflate too much.

    Batter will be pretty watery, so test first on waffle press. Add flours if needed.
    Cook on waffle iron until a medium golden color. It will take longer than you expect.

    For berry sauce:
    Blend all sauce ingredients.
    Heat or leave cold.
    Serve on top of waffles or dip waffles in sauce on the side. I preferred on the side.


    Saturday, February 23, 2013

    Gluten-free Chicken Tenders


    Chicken tenders were a big part of my diet growing up in the Bronx. But thy were unfortunately from McDonald's and I'm not sure if they were really chicken after all. But I thought I'd never be able to enjoy my love for the small but mighty chicken tender again, until....

    There's a stand in town called the cultured Caveman and I had the best checken tenders there. They are a very unique cart and fry their tenders in beef tallow. Needless to say, I wasn't about to go out and render some beef tallow and I figured coconut oil is about the healthiest way to fry if you're gonna fry to begin with. Success! The kids and my honey ate them all up. These can be reheated the next day if needed. You can use either coconut or brown rice flour, I think coconut works best. 


    Tuesday, February 5, 2013

    Gluten-Free Mac and Cheese!

    I have to admit something embarrassing, I've never had home made mac and cheese....until tonight!
    And it was as good as it looks. The ultimate in comfort food but with no wheat to speak of. Here's how. 

    Ingredients:
    • 1 lb. Gluten-free elbow pasta (I like Ancient grains quinoa pasta, tastes lovely and not gummy)
    • salt and pepper to taste
    • 4 tbs. butter (1/2 stick)
    • 3 cups grated mozzarella cheese 
    • 4 cups milk ( I used goat for better digestibility)
    • 2 tbs. arrowroot
    • 2 tbs. brown rice flour
    • 2 tbs. tapioca flour (also called tapioca starch)
    Note: If you'd like to make it super easy, just use some Bob's Red Mill Gluten-Free Baking Flour in place of ingredients after milk

    Preheat oven to 375 degrees. 
    Cook noodles until almost done.
    In a saucepan, bring milk slowly to a boil and then shut off heat. Make sure not to burn!
    While milk is heating, melt butter in a small pot and stir in flour, cook for 5 minutes.
    Pour in milk and whisk until sauce thickens up, about 4 minutes.
    Next, put noodles in a baking dish.
    Pour sauce over noodles, put half of cheese over top and mix lightly. Put the rest of the cheese on top.
    Bake in oven for 20 minutes. Increase heat to broil and bake for 6 minutes more. 

    Best served hot! I'm going for seconds now, see ya' later. dddddd

    Friday, February 1, 2013

    Gluten-Free Chocolate Chip Banana Cake


    It's high time that I tried another banana-chocolate chip combo. This is much like my old stand by banana chocolate chip bread, but bunt style and a bit moister. And my absolute favorite part about this ake, is it's great texture!

    This recipe is adapted from the great Bette Hagman's The Gluten-Free Gormet Cooks Comfort Foods. She has a great guide to gluten-free flour mixes that is simple and has always turns out great. I made this a mini-bunt cake simply because I thought it'd look really cute. And I was right. I also made a cupcake and a mini loaf version to and they turned out perfect! 


    Ingredients: 
    • 2/3 cup and 1 tbs brown rice flour
    • 2/3 cup and 1 tbs tapioca flour
    • 2/3 cup and 1 tbs arrowroot
    • 2 tsp baking powder
    • 1 tsp baking soda
    • 1/2 tsp salt
    • 2 large very ripe mashed bananas
    • 2/3 cup buttermilk, or milk alternative (add lemon juice to milk if not using buttermilk, but recipe works best with diary milk.)
    • 1 tbs lemon juice
    • 1/2 cup butter
    • 1 cup coconut sugar (use 1 and 1/2 cups sugar if not using stevia)
    • 10 drops liquid stevia
    • 2 tbs ground chia-flax seed mix
    • 4 eggs
    • 2 tsp vanilla
    • 1/2 cup chopped walnuts
    • 1/4 cup chopped sunflower seeds
    • 1 cup vegan chocolate chips
    Preheat oven to 340 degrees. Use a greased or non-stick bunt pan. 
    In a medium bowl, shift all dry ingredients. 
    In a large bowl. cream sugar, stevia, and butter. Then add in ground seed mix, eggs, and vanilla. Mix well.
    Add in mashed bananas and mix with an immersion blender or hand mixer if you have one (cuts down on mashing time). 

    Add in flour mix a bit at a time until it's all a nice consistency. Mix for about 1 minute.
    Stir in nuts, seeds, and chips.
    Pour into pan and bake for 40 minutes. Bake for 55 minutes if making mini loaves.
    Let cool a bit before turning over onto a plate. Powdered sugar or your favorite glaze would work well, but we just do it plain and love it. Marvel at your creation!
    Now go eat!


    Thursday, January 24, 2013

    Berry Berry Granita Smoothie


    My boys are crazy about this newest special treat creation. Treats are a big thing at our house and it's hard to keep it healthy. But I think I've done it. Tons of berries and a few scoops of superfood powders make this very high in antioxidants, vitamins and minerals. And it's the easiest recipe I've ever posted. Try it, this batch had to be guarded while in the blender so watch those little hands! 


    Ingredients: 


    Now, throw it all in a blender, I love my Ninja, absolutely great for blended treats like this one. 
    Blend in high for 1-2  minutes or until it's smooth and to your liking. 
    It should resemble the consistency of very soft ice cream. 
    Have spoon waiting and ready, serve and enjoy watching everyone go crazy! 


    Wednesday, January 16, 2013

    Berry Coconut Bar- gluten-free


    I love coconut. And this bar has tons. Coconut is not only tasty, but it is one of the best fats you can eat. And good fats are not only help your skin and hair shine, help you get the bad fats out of your system, but also help you and your kids developing brains. The brain is made of fat, and it's nerves are coated with even more fat to help transmissions. So the lesson here is eat more good fats. But also add some tasty berries.

    Recipe:

    • 3 & 1/2 cups gluten free flour mix (I used the featherlight mix by 
    • 3/4 cup shredded coconut
    • 3/4 cup coconut sugar (or regular sugar)
    • 12 drops liquid stevia
    • 1 tsp salt
    • 1 stick of butter (8 tbs) or 8 tbs coconut oil
    • 4 egg whites
    • 4 cups of mixed berries (I used blueberries and strawberries)
    • 1/3 cup chopped walnuts